Why custom pattern installation is a different discipline
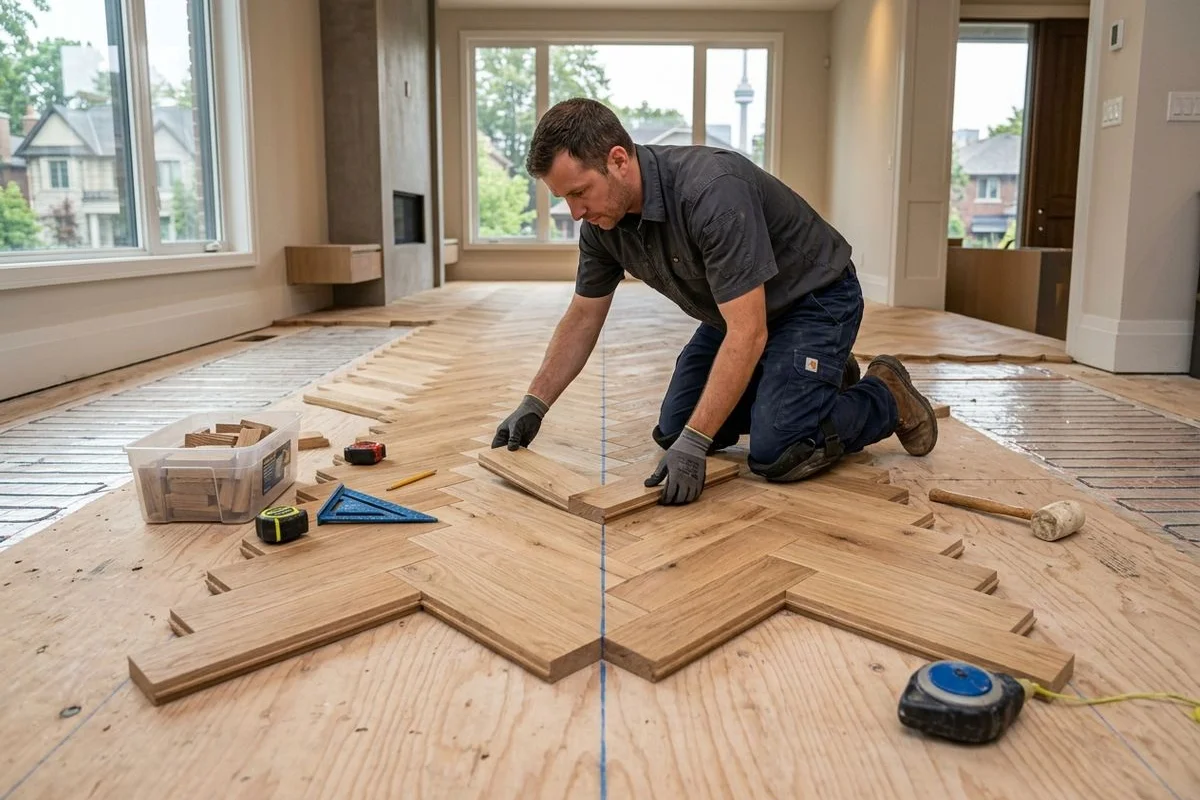
Installing a herringbone or chevron floor is not a faster version of straight-lay hardwood. It is a fundamentally different process with tighter tolerances, additional planning steps, and a longer project window. The most experienced straight-lay installer in Toronto can still produce poor results on a pattern floor without the right sequence and preparation.
The difference comes down to mathematics. In a straight-lay floor, a board that is slightly off-angle is hidden by the boards on either side of it. In a herringbone or chevron floor, every joint is visible at an angle, and any deviation from the datum line accumulates across the room. By the far wall, a 2mm drift at the starting point becomes a 20mm gap.
Toronto Quality Wood Flooring approaches every custom pattern flooring project with a strict seven-step sequence. Each step is a dependency for the one that follows. Skipping or rushing any stage creates problems that cannot be corrected without pulling up the floor and starting again. For a broader look at how herringbone and chevron compare visually and structurally before installation begins, see our herringbone vs chevron guide.
Step 1 - Subfloor preparation
Pattern installation requires a subfloor that is flat to within 3mm over 1.8m (3/16 inch over 6 feet). This is a stricter tolerance than straight-lay hardwood, which can tolerate slightly more variation without the result becoming visible. With a geometric pattern, any subfloor variation translates directly into visible joint misalignment.
High spots are belt-sanded or ground down with a floor grinder. Low spots are filled with floor levelling compound - Mapei Ultraplan or equivalent - and allowed to cure for a minimum of 24 hours before any layout work begins. Any flex in a plywood subfloor must also be addressed: loose sheets are screwed down, and any sections with spring or bounce are treated with construction adhesive injected from below where accessible.
On concrete slabs, a moisture test is mandatory before any hardwood is installed. Slab relative humidity above 75% requires a moisture-barrier urethane adhesive rather than a standard product. The slab reading directly determines which adhesive is specified.
This step is the one most often skipped or abbreviated on poorly executed pattern jobs. The result is always the same: within 12-18 months, joint lines open, edges lift, and the geometric lines of the pattern become irregular.
Step 2 - Layout planning
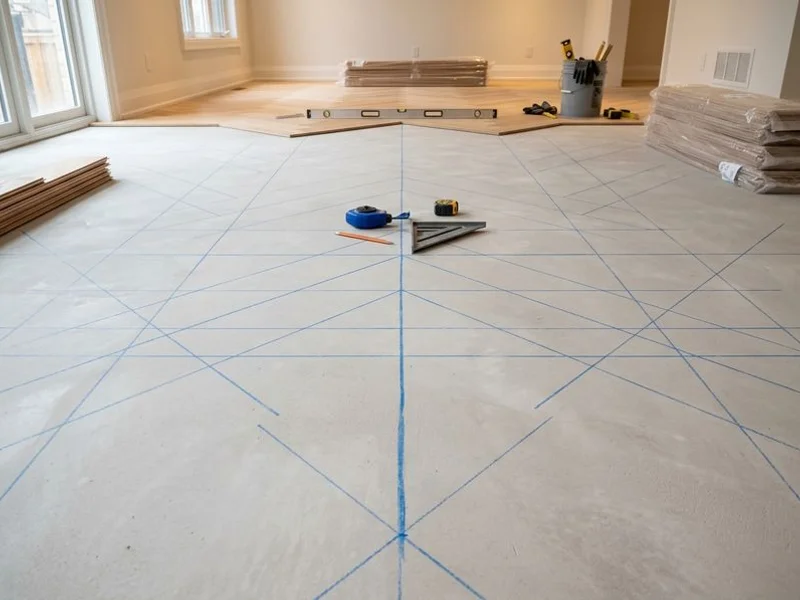
Layout planning is the most important step that most homeowners never observe, because it happens before a single board is placed. The goal is to establish the room’s true centre and snap perpendicular chalk lines through it - not from a corner, and not from a wall.
Walls are almost never square to each other. In Toronto homes built between 1900 and 1970, it is common to find walls that are 10-15mm out of square over the length of a room. If a pattern is started from a wall corner, that misalignment becomes the starting point, and the pattern drifts off-axis as it crosses the floor. By the time it reaches the opposite wall, the visual effect is noticeably skewed.
Starting from a centred datum eliminates this problem. We snap two perpendicular chalk lines through the room’s geometric centre, verified with a 3-4-5 triangle check, and all layout radiates outward from that point. Both sides of every pattern axis have equal perimeter cuts, and the floor reads as symmetrical from any viewing position in the room.
Step 3 - Dry-fit
Every block or plank is positioned without adhesive before any glue is applied. This dry-fit phase reveals three things that cannot be identified from measurements alone:
- How the pattern meets walls on all sides, including whether any cut pieces will be too narrow to hold safely
- Whether the starting centre point produces genuinely balanced cuts after accounting for the room’s actual geometry
- Whether any unusual boards with grain anomalies or colour variation need to be positioned away from primary sightlines
Adjustment during dry-fit costs nothing. Adjustment after adhesive application costs the floor. We treat this phase as mandatory quality control, not an optional check.
The dry-fit also confirms that the species chosen reads correctly in the room’s actual light conditions. European White Oak in a north-facing room reads very differently than in a south-facing room with afternoon sun. If the colour or grain direction needs adjustment, this is the moment to make that call.
Step 4 - Glue-down installation
Custom pattern floors are installed using a full glue-down method. Floating installation is not appropriate for herringbone or chevron because the geometric alignment requires each block to be locked permanently in position. A floating floor allows micro-movement that, over time, causes the pattern lines to shift.
The adhesive used is a moisture-barrier urethane - Bona R848 or equivalent. This product provides a vapour-retarding layer between the slab and the wood while also bonding the blocks permanently. It is applied with a 1/4 inch V-notch trowel. Working time is 20-25 minutes per section at standard room temperature, so installation proceeds in manageable grids.
Each block is pressed firmly into the adhesive bed and held with a rubber mallet and tapping block until the adhesive grabs. Installation pace is intentionally slower than straight-lay - 200-300 sq ft per day for herringbone, 150-250 sq ft per day for chevron, compared to 400-600 sq ft per day for straight-lay.
The floor must not be walked on until the adhesive has cured for a minimum of 24-48 hours, depending on temperature and humidity conditions.
Step 5 - Precision cutting
Herringbone requires square-cut rips at each wall perimeter - straightforward cuts that any table saw handles reliably. The perimeter blocks must be cut to fit the space between the last full block and the wall while maintaining the pattern angle.
Chevron requires mitre cuts at the exact pattern angle on every board end. These cuts must be consistent to within fractions of a degree across the entire floor, or the continuous V-line at the centre of the floor will waver. A table saw with a digital angle fence is the standard for quality chevron work. Band saw cuts are used for tight radius situations around architectural features.
For both patterns, cuts around fixed objects - fireplace hearths, built-in cabinetry bases, door architraves - require careful templating. The geometric pattern must meet these features cleanly, and poor perimeter cuts are immediately visible in a geometric floor.
Step 6 - Sanding and finishing
Site-finished pattern floors are sanded using the same grit sequence as straight-lay floors: 36-80-100-120 grit. The critical difference is the sanding direction. Pattern floors must be sanded diagonally - at 45 degrees to the pattern direction - not with the grain. Sanding with the grain on a herringbone floor tracks along individual blocks and misses the cross-grain joins, leaving raised ridges at every joint.
Diagonal sanding with a multi-disc orbital sander produces a uniformly flat surface across the entire floor, regardless of the pattern direction.
Stain application (where specified) follows sanding. Finish coats are then applied in sequence: 2-3 coats of Bona Traffic HD waterborne polyurethane or Rubio Monocoat oil, depending on the client’s preference. Bona Traffic HD is the most common specification for family spaces because of its durability and easy maintenance. Rubio Monocoat is preferred for heritage-restoration projects where a more natural, penetrating oil finish is appropriate.
Pre-finished pattern boards skip the site sanding and finishing entirely. The trade-off is that pre-finished floors cannot be custom stain-matched to adjacent rooms, which matters in Forest Hill and Rosedale renovations where the pattern room connects to rooms with original floors.
Step 7 - Transitions and completion
Perimeter transitions are cut and fitted after the finish has cured. T-bar transitions at doorways, reducer strips at height changes, and quarter-round at wall perimeters are all installed to the wall - never fastened to the floor itself. Fastening trim to the floor prevents the seasonal movement that wood requires and causes the perimeter blocks to lift over time.
A final inspection under raking light checks the entire floor for any joint irregularity, finish inconsistency, or alignment drift. The raking-light check is the most reliable way to find anything that might otherwise go unnoticed under standard room lighting.
| Phase | Straight-lay | Herringbone | Chevron |
|---|---|---|---|
| Subfloor flatness tolerance | 4mm/1.8m | 3mm/1.8m (stricter) | 3mm/1.8m (stricter) |
| Layout method | Wall-start | Centre datum | Centre datum |
| Install speed | 400-600 sq ft/day | 200-300 sq ft/day | 150-250 sq ft/day |
| Sanding direction | With grain | Diagonal to pattern | Diagonal to pattern |
| Finishing time (adds 30-40%) | Standard | +30-40% | +30-40% |
| Total project timeline (1,000 sq ft) | 6-7 days | 8-10 days | 9-12 days |
What a complete pattern project timeline looks like
For a typical 400-500 sq ft herringbone installation in European White Oak, site-finished:
- Day 1: Subfloor assessment, levelling compound poured, moisture test
- Day 2: Compound cured, datum lines snapped, dry-fit completed
- Days 3-4: Glue-down installation from centre outward
- Day 5: Adhesive cure, perimeter cuts and border installation
- Day 6: Sand (36-80-100-120 grit, diagonal direction)
- Day 7: First finish coat (Bona Traffic HD or Rubio Monocoat)
- Day 8: Second coat
- Day 9: Final coat, transitions installed, completion inspection
For chevron, add 1-2 days for cut precision. For pre-finished material, remove the finishing days and close out by day 6-7.
Book your consultation
Toronto Quality Wood Flooring provides free in-home consultations for all custom pattern projects. We assess the subfloor, discuss species and block size, and return a fixed-price written quote within 48 hours. Every quote itemises subfloor preparation, layout, installation, finishing, and transitions separately so you can see exactly where the budget goes.
Contact us to schedule your visit and start planning your custom floor.