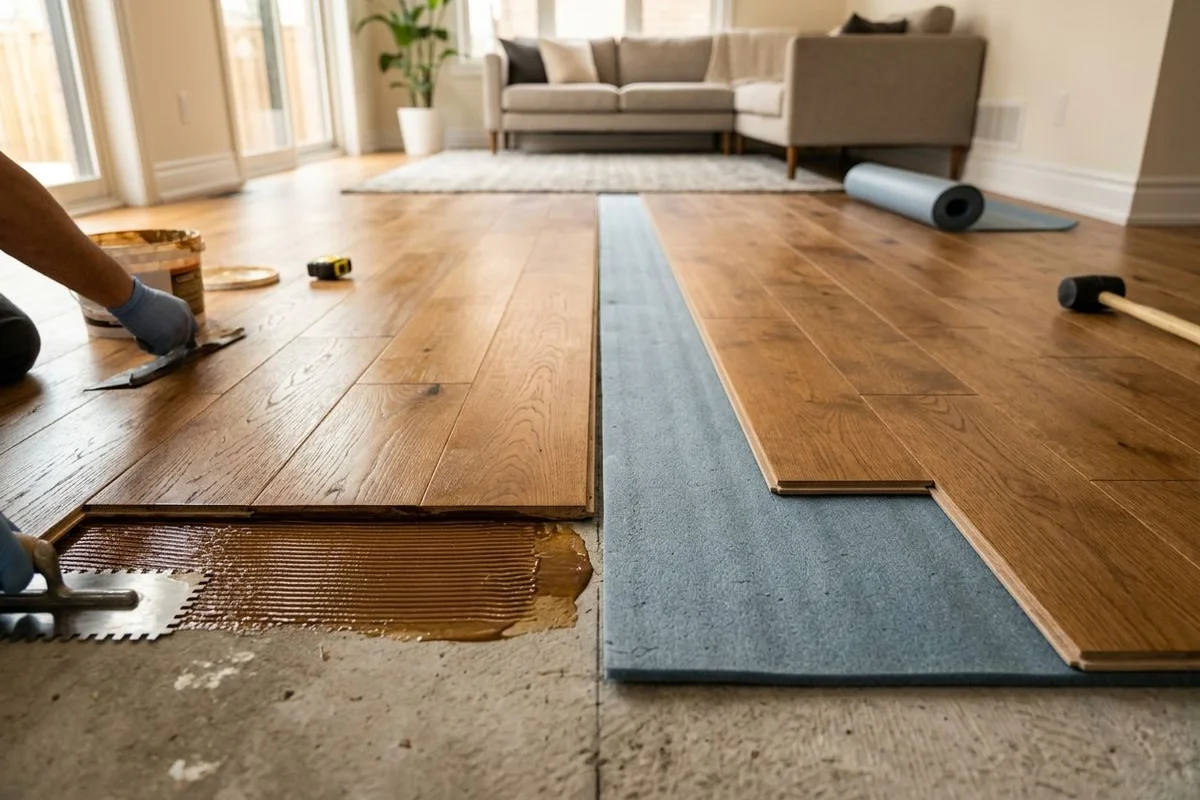
Two installation methods for engineered hardwood - what actually separates them
The installation method for engineered wood flooring shapes how the floor sounds, how stable it feels underfoot, and what the project costs. Glue-down bonds the planks directly to the subfloor using a moisture-barrier urethane adhesive. Floating clicks the planks together over an underlayment pad with no adhesive and no fasteners. Both methods produce a refinishable hardwood floor. The differences show up in sound performance, installation time, reversibility, and cost.
Glue-down installation
Glue-down bonds engineered planks permanently to a concrete or plywood subfloor using a moisture-barrier urethane adhesive. Bona R848 is the most widely specified product for this application - it provides both the bond and a vapour barrier rated for concrete slab moisture. Mapei Ultrabond ECO 575 is a common alternative. Wet film coverage runs 40-50 sq ft per gallon, and the working window (open time before the adhesive skins over) is 15-25 minutes for Bona R848 - requiring experienced trowel technique to keep pace.
Before any glue-down installation over concrete, an ASTM F2170 in-situ relative humidity test is required. A sensor is installed in a drilled hole in the slab and read after 24-72 hours. Engineered hardwood requires a reading under 75% RH. Between 75% and 85% RH, a vapour barrier primer (Bona DS 250 or equivalent) must be applied before the adhesive. Above 85% RH, the slab is too wet for engineered hardwood and LVP becomes the safer product choice.
Where glue-down is the right method
Glue-down is the correct installation method for:
- Mississauga and Etobicoke slab-on-grade homes where a solid, immovable feel is expected
- Don Mills basement slab conversions where floating over a separate vapour barrier would add height
- Condominiums in Humber Bay, Yorkville, and the downtown core where IIC acoustic requirements must be met - glue-down delivers the best impact sound performance
- Radiant heat systems, where the adhesive bond ensures efficient heat transfer from the heated slab to the floor surface
- Wide-plank engineered (over 6”) where lateral movement during seasonal humidity changes would stress click-lock joints
Advantages: most stable method, best sound performance (no hollow echo underfoot), no seasonal movement gap at walls after adhesive cures, suitable for commercial applications with heavy wheeled traffic.
Disadvantages: cannot be removed without damaging boards and subfloor surface. Requires proper open-time management during installation. Requires ASTM F2170 moisture testing before committing - this is not optional.
Floating installation
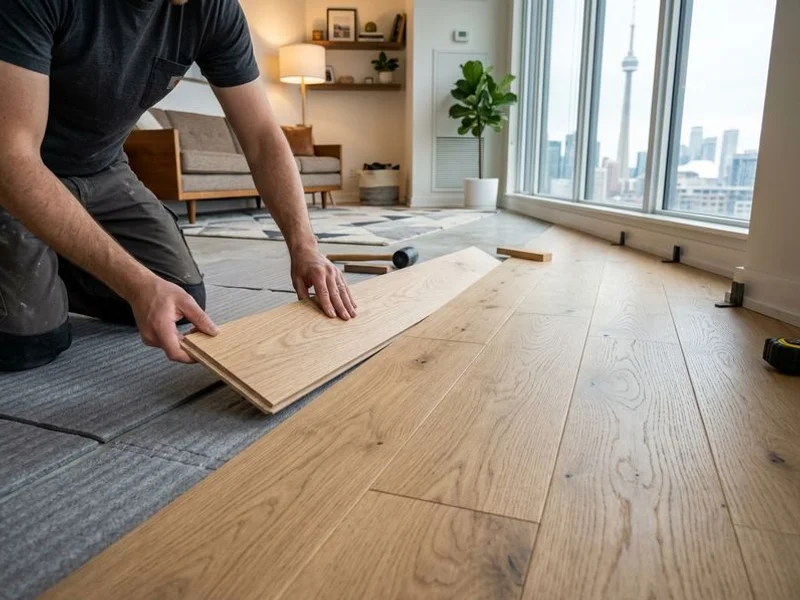
Floating uses click-lock edge profiles to join engineered planks mechanically over a foam or acoustic underlayment. No adhesive, no fasteners. The entire floor floats as one connected unit. A 10mm expansion gap at all walls is required to allow for seasonal movement - this gap is covered by baseboards or quarter-round.
Floating installation runs 30-40% faster than glue-down because there is no trowel work and no adhesive cure time before the floor can be walked on. A 500 sq ft floating install typically completes in one day; the same project glue-down runs 1.5-2 days including adhesive cure.
Underlayment selection matters more than most buyers realise
The underlayment under a floating floor determines whether it sounds like a premium installation or a hollow drum underfoot. Options and their approximate impact sound reduction:
- Basic foam underlayment: 5-7 dB impact sound reduction. Not appropriate for multi-storey homes where footstep noise carries to the floor below.
- Acoustic foam (mid-grade): 8-12 dB reduction. Suitable for above-grade rooms in detached homes.
- Cork underlayment: 12-18 dB reduction. A natural option with good thermal properties underfoot.
- Acoustiblok or equivalent premium membrane: 15-20 dB reduction. Used where condo boards specify IIC 55+ documentation.
Condominiums in Humber Bay and North York buildings typically require an underlayment with documented IIC 55+ performance. Verify the building’s acoustic requirements before selecting underlayment - a product that meets the IIC requirement must be specified, not approximated.
Where floating is the right method
- North York finished basements where the installation may need to be removed to access plumbing or drainage
- Humber Bay and downtown condo installs where an acoustic underlayment rated to IIC 55+ satisfies the building requirements
- Over-existing-floor jobs where adhesive would not bond correctly or would add excessive height
- Renovation projects where install speed is a priority and the room is residential rather than commercial
Advantages: faster installation, removable and reusable if needed, no adhesive cure time, lower material cost on the installation side.
Disadvantages: hollow sound underfoot without dense underlayment, requires 10mm expansion gap at all walls, not appropriate for commercial spaces with heavy wheeled equipment traffic.
Method comparison
| Factor | Glue-Down | Floating |
|---|---|---|
| Sound performance | Excellent - no hollow echo | Depends on underlayment (foam to Acoustiblok) |
| Stability | Highest - no movement after cure | Moderate - expansion gap required at walls |
| Install speed | Slower (adhesive cure adds 24 hrs) | 30-40% faster |
| Reversibility | No - boards and subfloor damaged on removal | Yes - planks lift cleanly |
| Moisture barrier | Built into adhesive (Bona R848) | Separate vapour barrier underlayment required |
| Adhesive / underlayment cost | +$1-2/sq ft (urethane adhesive) | +$0.50-2/sq ft (underlayment) |
| Radiant heat compatible | Yes - adhesive bonds to heated slab | Restricted - manufacturer approval required |
What we see most often in Toronto neighbourhoods
Glue-down is the default for condo installations in Humber Bay, Yorkville, and the downtown core. The IIC sound requirements enforced by condo boards in those buildings are most reliably met with a glue-down method, which eliminates the air gap between board and substrate. Property managers in those buildings routinely ask for the acoustic test report before approving the installation method - glue-down with a documented adhesive system is the path of least resistance through that approval process.
For North York finished basements and Don Mills slab conversions, both methods are viable when the ASTM F2170 test confirms slab RH under 75%. If the homeowner wants to preserve the option to access the slab later (drain rough-in, in-floor heating addition), floating gives that flexibility. If they want the floor to feel identical to a main floor above-grade install, glue-down delivers it.
Slab-on-grade main floors in Mississauga and Etobicoke new builds almost always receive glue-down. The feel difference underfoot between glue-down and floating is most noticeable in these wide-open living areas where you walk across a large expanse of floor.
Cost comparison for a 500 sq ft Toronto installation
- Floating: underlayment ($250-1,000) plus labour ($1,250-2,000 for click-lock installation) - total approximately $1,500-3,000
- Glue-down: urethane adhesive ($400-800 in material) plus trowel labour ($2,000-3,500 for glue-down installation) - total approximately $2,400-4,300
The boards cost the same regardless of method. The difference is in material (adhesive vs underlayment) and labour intensity - trowel work is more exacting and time-consuming than click-lock.
Toronto Quality Wood Flooring provides free in-home estimates with a 48-hour fixed-price written quote. We assess the subfloor, conduct ASTM F2170 moisture testing on concrete, and confirm the installation method before you commit to any material purchase. Contact us to schedule your assessment.
Glue-Down vs Floating: Condo-Specific Considerations
Condo installations in Toronto - Humber Bay, Yorkville, CityPlace, the downtown core - have a layer of complexity that detached home projects do not. Beyond the structural question of which method performs best, condo installations must satisfy the building’s acoustic requirements before the property manager will issue installation approval. Most Toronto condo boards require IIC 55+ floor impact noise ratings. Getting that number wrong means the building refuses the install and the material order needs to change.
Floating with a certified acoustic underlayment is the most common solution for condo installations. The IIC value of the total assembly - board plus underlayment plus concrete slab - determines whether the project passes. Basic foam underlayment produces IIC 42-48, which is insufficient for any building requiring IIC 55+. Cork underlayment at 6mm thickness achieves IIC 52-58 - close but not always sufficient depending on the specific building standard. Acoustiblok rubber membrane or QuietWalk Plus achieves IIC 58-65, which satisfies the vast majority of Toronto condo board acoustic requirements with documentation to support it. When selecting underlayment for a condo project, the IIC certification number on the product data sheet is what the property manager will look at. Specify the underlayment before ordering material, not after.
Glue-down provides the best sound performance of any installation method because it eliminates the air gap between board and substrate entirely. That air gap is responsible for the hollow-underfoot tap that floating installs can produce. In a condo context, glue-down with Bona R848 on a concrete slab eliminates the underlayment IIC question almost entirely - the bonded assembly transmits impact noise differently than a floating system, and typically performs better on in-situ acoustic testing. The requirement is that the adhesive must not be moisture-sensitive, and the slab must pass ASTM F2170 testing first. Bona R848 is rated for concrete slab with moisture barrier properties, making it the standard specification for condo glue-down installations. Before committing to the installation method, provide the underlayment’s IIC certification document (for floating) or the adhesive system specifications (for glue-down) to the condo board for pre-approval. Discovering the method is not approved after material delivery is an expensive problem.
Common Mistakes with Glue-Down on Concrete
Glue-down over concrete is a technically demanding installation method. The adhesive chemistry, trowel technique, and timing all affect the quality and longevity of the result. These are the five most common errors Toronto Quality Wood Flooring encounters when re-doing a failed glue-down project:
-
Skipping the ASTM F2170 moisture test. This is the most common and most costly error. Installing engineered hardwood over a concrete slab without confirming in-situ RH is below 75% produces a floor that cups and fails as slab moisture migrates into the boards. The test takes 24-72 hours and costs almost nothing relative to the material and labour investment. There is no reasonable justification for skipping it.
-
Using the wrong notch trowel. Urethane adhesive like Bona R848 requires a 1/4” V-notch trowel for correct coverage. A larger notch leaves too much adhesive and creates voids; a smaller notch under-applies and produces bond failures. The trowel specification is on the adhesive product data sheet - use the size specified by the adhesive manufacturer, not the installer’s preference.
-
Exceeding the adhesive open time. Bona R848 has a working open time of approximately 15-25 minutes per spread section. Applying adhesive over more than 30 sq ft at a time before laying boards risks the adhesive skinning over - the surface dries while the board is still being placed, and the bond is compromised. Experienced installers work in small sections: spread, lay, move forward.
-
Walking on boards before full adhesive cure. Urethane adhesive reaches full cure in 24-48 hours after installation. Walking on boards before that window allows the boards to shift position before the bond sets. Traffic in the first 24 hours means boards settle slightly out of alignment, producing lippage (height differences between adjacent boards) that is impossible to correct without removal.
-
Not rolling the floor after laying. After each section is laid, a 100 lb floor roller is passed over the boards in both directions. This step presses the boards firmly into the wet adhesive and eliminates air pockets under the boards. Skipping the rolling pass is common on DIY or rushed installs and results in hollow spots - areas where the board did not fully seat into the adhesive - that are audible and felt underfoot for the life of the floor.
Free In-Home Assessment
Toronto Quality Wood Flooring offers a free in-home assessment for all engineered hardwood projects. We assess the subfloor, conduct ASTM F2170 moisture testing on concrete slabs, confirm whether glue-down or floating is the right method for your specific conditions and condo requirements, and provide a 48-hour fixed-price written quote. Contact us to schedule your assessment anywhere in the Greater Toronto Area.