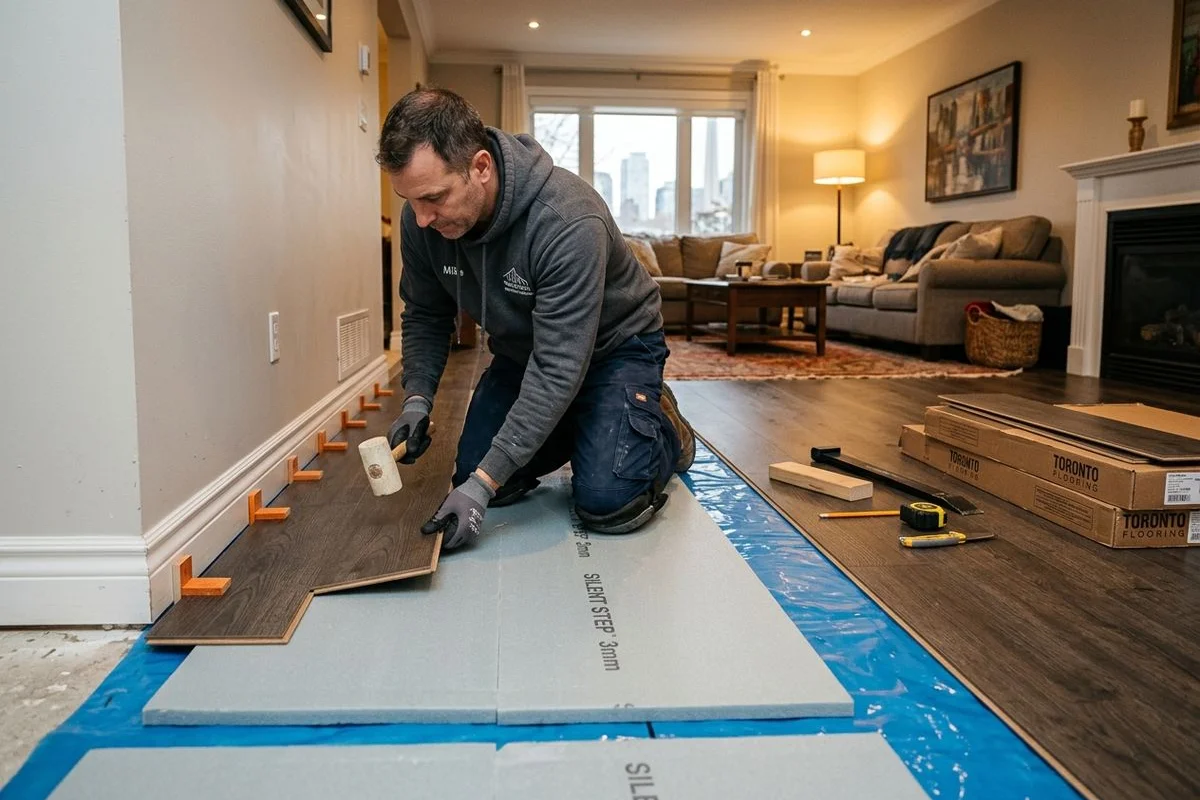
What a professional laminate installation actually involves
A laminate floor that lasts 20 years and a laminate floor that fails in three years are often made from the same product. The difference is the installation. The click-lock system is simple in concept, but every step prior to and during the installation determines whether the floor performs as specified or develops problems within its first few years.
Toronto Quality Wood Flooring installs laminate across the GTA using a consistent seven-step process. For broader information on our laminate flooring service, visit our main hub page. If your project is a basement, our guide on best laminate for basements covers the specific product and moisture requirements that apply below grade.
Step 1 - Subfloor assessment
The first step happens before any material is ordered: assessing the subfloor’s flatness and moisture condition.
Laminate requires a subfloor that is flat to within 3mm over 1.8m (3/16 inch over 6 feet). This standard applies to both concrete slab and plywood subfloors. A straightedge check across multiple axes of the room identifies high spots and low spots.
High spots on a concrete slab are ground down with a belt sander or floor grinder. High spots on plywood are sanded or planed. Any protruding nail heads or staples from removed carpet must be flattened before underlayment goes down - each one will telegraph through the flooring.
Low spots on concrete are filled with self-levelling compound and allowed to cure for a minimum of 24 hours before the next step proceeds. Low spots on plywood can be addressed with levelling compound or by shimming and screwing the sheet from below where accessible.
Moisture testing on concrete subfloors: a conductance metre reading on the slab surface provides an initial indication. Where any concern exists, ASTM F2170 in-situ probe testing (24-hour reading) is the reliable standard. Slab relative humidity above 75% requires a moisture-resistant laminate specification and careful attention to vapour barrier continuity.
Plywood subfloor squeaks must also be addressed at this stage. Squeaks come from plywood sheets that are not fully secured to the joists. Each squeak point is screwed down with construction screws. Screwing after laminate is installed is not possible - the problem must be solved before the floor goes over it.
Step 2 - Vapour barrier (concrete subfloor)
On any concrete slab, a 6-mil polyethylene vapour barrier is installed before underlayment. This is not optional. Concrete is porous, and moisture vapour migrates upward through it year-round. The barrier prevents this vapour from reaching the HDF core of the laminate.
The barrier is laid with joints overlapped 200mm and secured with vapour-barrier tape. It runs 50mm up the walls at the perimeter and is trimmed flush after the baseboards are installed.
If the underlayment product specified includes an integrated vapour barrier (Quick-Step Combi-Floor, Pergo Gold underlayment, and others), the separate 6-mil poly is not needed - the integrated product replaces it. Using both is not recommended because the extra cushion creates a “stack effect” that puts stress on the click-lock joints.
On dry plywood subfloors above grade, a separate vapour barrier is not required unless the manufacturer of the specific laminate product specifies otherwise.
Step 3 - Underlayment selection and installation
The underlayment layer sits between the vapour barrier (or plywood subfloor) and the laminate planks. It serves three functions: acoustic reduction, minor surface correction, and thermal insulation.
Underlayment options and their appropriate applications:
- Basic foam (3-5mm): 15-18dB impact noise reduction. Suitable for above-grade installations where acoustic performance is not a concern.
- Cork underlayment (6mm): 20-25dB impact noise reduction. Warmer underfoot than foam. Preferred for second-floor installations or any room where acoustic performance matters.
- Rubber/cork composite acoustic underlayment: IIC ratings of 50-58. Required for many Toronto condominium buildings and highly recommended for any second-floor installation in a multi-unit home.
- Pre-attached underlayment: Many laminate products have foam underlayment pre-applied to the back of each plank. No separate underlayment layer is needed or wanted - adding a separate layer over pre-attached underlayment creates the stack effect.
Underlayment seams are butted (not overlapped) and taped. Overlapped seams create raised ridges that telegraph through the flooring.
Step 4 - Layout planning
The layout planning step determines where the installation starts and how the planks are oriented. This step prevents the common outcome of arriving at the far wall with a strip of flooring that is too narrow to look correct or hold mechanically.
Orientation: Laminate planks typically run parallel to the room’s longest dimension, which visually elongates the space. In rooms that receive direct natural light from one side, running the planks perpendicular to the windows enhances the grain appearance.
Starting position: Check whether the room is square using a 3-4-5 triangle measurement. If the walls are significantly out of square, start from a chalk line snapped 300mm from the straightest wall rather than from the wall itself.
First and last row calculation: Measure the room width perpendicular to the plank direction and calculate how many full planks fit and what the final-row width will be. If the final row would be narrower than 50mm, trim the first row narrower to widen the final row. Both the first and final rows should be wider than 50mm for structural and visual reasons.
Stagger: End joints between planks in adjacent rows must be staggered by a minimum of 300mm. A 400-500mm stagger is preferable for wide-plank products. Stagger prevents “H-pattern” joint alignment, which is structurally weak and visually distracting.
Step 5 - Click-lock installation
The installation proceeds row by row from the starting wall toward the opposite wall. Laminate uses one of two click mechanisms: angle-lock (tilt the board and click) or push-lock (push the board flat and press). The product documentation specifies which method applies.
Angle-lock (most common): Hold the plank at a 20-30 degree angle, engage the long edge with the previous row’s groove, then lower the plank flat to lock it.
Short-end joints: After the long edge is locked, the short end of the next plank in the same row is clicked into the previous plank. A tapping block and rubber mallet are used to close the short end joint fully. Never strike the plank directly with the mallet - this crushes the locking edge.
Pull bar: For the final row against the wall, where a tapping block cannot be used from the front, a pull bar hooks over the plank edge and is struck with the mallet to pull the plank into position.
Door jambs: Undercut door jambs with a handsaw using a scrap piece of underlayment and laminate as a height guide, so the flooring slides under the casing rather than butting against it.
Step 6 - Expansion gaps
This is the most frequently ignored requirement in DIY laminate installations, and it is the cause of the most common failure mode: summer buckling.
Laminate floats over the underlayment as a single unified panel. The entire floor expands and contracts with seasonal humidity changes. Toronto’s humidity swing from winter (30-35% RH) to summer (55-70% RH) is substantial enough to cause the floor to expand by several millimetres across a typical room.
An 8-10mm expansion gap must be maintained at:
- All walls
- All door jambs and architraves
- All fixed objects that penetrate the floor (fireplace surrounds, pillars, HVAC duct bases)
- All sliding door thresholds (the most commonly missed location - summer expansion will push the floor into a sliding door track and buckle it)
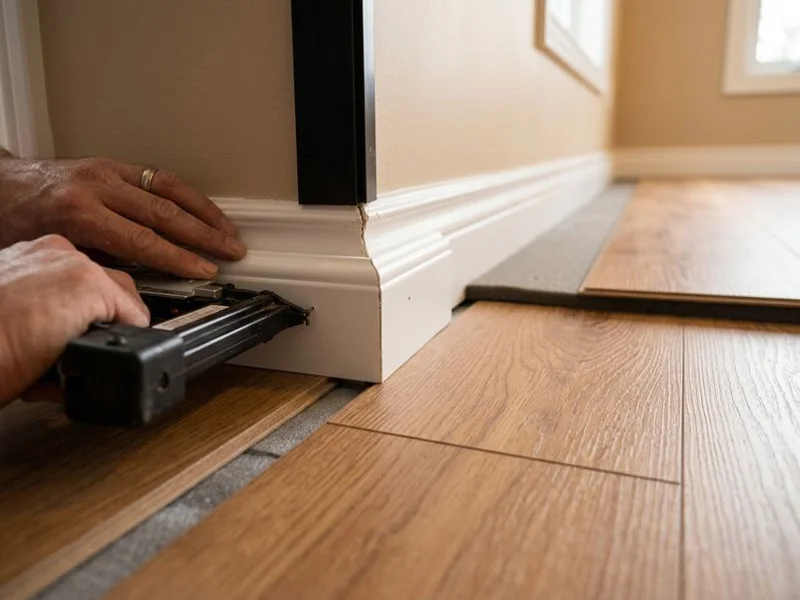
This gap is hidden by baseboards, quarter-round, and transition strips after installation. It must not be filled with caulk, foam backer, or any other material - the gap must remain open to allow movement.
Transition strips at doorways: T-bar transition strips allow adjacent laminate areas to move independently at doorways. Reducer strips handle height differences between laminate and adjacent lower flooring (tile, carpet). End caps address the perimeter at sliding doors and raised hearths.
Quarter-round or shoe moulding at walls is nailed to the wall, not to the laminate. Nailing it to the laminate would pin the floor and prevent the seasonal movement it must make.
Step 7 - Completion and timeline
After all planks are installed and transitions fitted, the space is cleaned and a walkthrough inspection checks every visible joint for gaps, raised edges, or misalignment.
| Room size | Prep time | Install time | Trim/transitions | Total calendar days |
|---|---|---|---|---|
| Small room (200 sq ft) | 2-3 hours | 3-4 hours | 1-2 hours | 1 day (+ 2 days acclimation) |
| Medium room (500 sq ft) | 3-5 hours | 6-8 hours | 2-3 hours | 1-2 days (+ 2 days acclimation) |
| Full basement (1,000 sq ft with transitions) | 4-6 hours + levelling cure | 1 day | 3-5 hours | 3-4 days total including levelling cure |
| Whole home (1,500+ sq ft) | Full day + levelling cure | 1-2 days | Full day | 5-7 days including acclimation |
Material must arrive and acclimate in the installation space for 48 hours before installation begins. This acclimation period allows the HDF core to reach equilibrium with the room’s temperature and humidity so that cuts made during installation are accurate.
Common installation mistakes and what they cost
No expansion gap at exterior sliding door: The most reliable way to produce a buckled floor by August in a Toronto home. A 1cm gap costs nothing to leave. Replacing a buckled floor costs $3,000-8,000.
Underlayment stacked over pre-attached underlayment: Creates joint separation over time as the excessive cushion allows micro-movement under traffic. The result is audible clicking at joints within 12-24 months.
Joints not staggered: Creates H-pattern alignment that is structurally weak. Over time, these aligned joints separate and create gaps.
Subfloor not flat: Any bump or dip in the subfloor becomes a pressure point under the floating floor. Under traffic, that pressure eventually causes the click-lock joint to separate.
Book your installation estimate
Toronto Quality Wood Flooring provides free in-home estimates for laminate installations. We assess the subfloor, identify any preparation required, and return a fixed-price written quote within 48 hours. Contact us to schedule your in-home visit.