Two methods, one critical decision before you start
LVP installs in two fundamentally different ways: click-lock floating, where planks connect to each other and float over the subfloor as a single panel, and full-spread glue-down, where each plank is bonded directly to the substrate with pressure-sensitive adhesive. The choice between them affects installation time, long-term repairability, suitability for radiant heat, and the subfloor preparation requirements.
For most Toronto residential basement and above-grade installations, click-lock floating is the correct method. Glue-down is specified for commercial spaces, high-traffic entries, installations over radiant heat, and situations where a permanent bond is preferred for structural reasons.
Toronto Quality Wood Flooring installs both methods across the GTA. Our luxury vinyl plank flooring page covers the full service. For specific guidance on product selection and moisture management for below-grade projects, see our LVP for Toronto basements guide.
Click-lock floating installation: step by step
Step 1 - Subfloor preparation
The subfloor must be flat to within 3mm over 1.8m (3/16 inch over 6 feet). SPC rigid-core LVP tolerates subfloor variation slightly better than hardwood because the rigid core bridges minor dips, but it does not bridge them indefinitely. Low spots over 4mm create pressure points under the floating floor that eventually cause the click-lock joint to crack at that location.
On concrete: Grind down any high spots with a floor grinder. Fill low spots with self-levelling compound and allow 24-hour cure. Check for and remove any protruding screws, staple heads, or adhesive ridges from previous flooring.
On plywood: Sand down high spots. Fill gaps and low spots with floor-patching compound. Secure any squeaking areas with construction screws to joists before installing LVP over them.
Cleanliness: All debris, dust, old adhesive residue, and paint must be removed. Anything embedded under a floating floor creates a pressure point under traffic.
Step 2 - Slab moisture test (concrete subfloors)
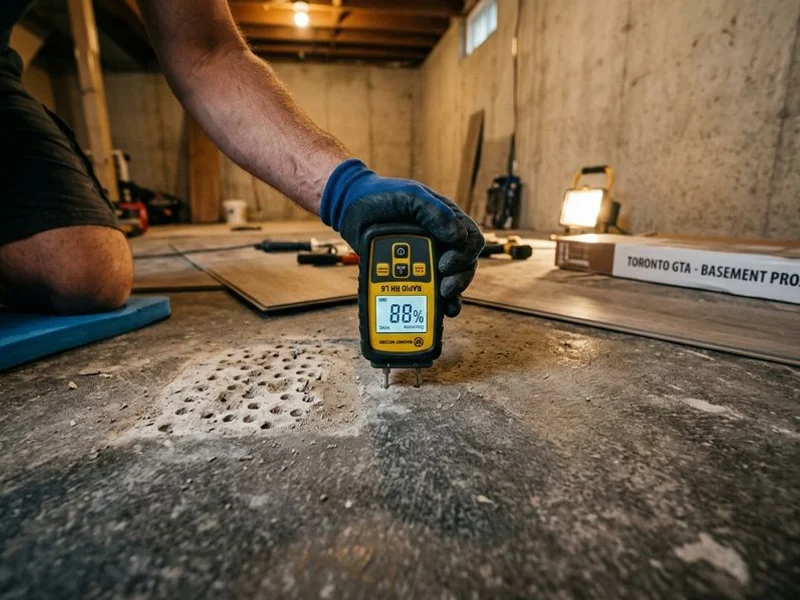
Before any LVP is installed on a concrete slab, moisture testing is mandatory. SPC LVP’s core is 100% waterproof, but moisture trapped under a floating floor between the slab and the vapour barrier can generate mould regardless of the plank’s waterproof construction.
The ASTM F2170 in-situ probe method is the most reliable test for Toronto basement slabs. Probes are installed in drilled holes in the concrete and read after a minimum 24-hour equilibration period. Acceptable slab RH for most SPC LVP products is up to 95% - significantly more tolerant than the 75% limit for engineered hardwood or laminate. This is one of the key advantages of SPC for Toronto basements.
Surface calcium chloride tests are faster but measure only surface emission rate, not internal slab conditions. Where the calcium chloride test shows high emission, an in-situ probe test is the follow-up before installation proceeds.
New concrete requires 60-90 days of cure time before any flooring is installed. Rushing this timeline creates elevated moisture readings that may resolve once the slab fully cures, but it is not worth the risk.
Step 3 - Vapour barrier
On concrete slabs, a 6-mil polyethylene vapour barrier is installed before underlayment or planks. Joints are overlapped 200mm and taped with vapour-barrier tape. The barrier runs 50mm up the wall at the perimeter and is trimmed behind the baseboard after installation.
If the LVP product has pre-attached underlayment, confirm whether the manufacturer specifies a separate vapour barrier or whether the integrated system replaces it. Many integrated-underlayment LVP products include a built-in vapour barrier film and do not require a separate 6-mil poly sheet. Stacking both products creates the “stack effect” - too much cushion under the click-lock joints causes them to loosen and separate over time under traffic.
On above-grade plywood subfloors, a vapour barrier is not typically required unless the product manufacturer specifies it for the specific product.
Step 4 - Layout planning
The layout determines where the first plank goes and how the rows are oriented. A few minutes of planning here prevents the frustrating outcome of a final row that is too narrow to be stable or presentable.
Orientation: Most residential LVP installations run planks parallel to the longest wall in the room. In rooms with significant natural light from one direction, running the planks perpendicular to the windows can enhance the grain appearance.
Starting wall: Start from the straightest wall. Check whether the room is square with a 3-4-5 triangle measurement. If the room is noticeably out of square, snap a chalk line parallel to the starting wall to use as the reference rather than the wall itself.
First and last row balance: Measure the room width perpendicular to the plank direction. Calculate how many full plank widths fit and what the last row width will be. If the last row would be narrower than 50mm, trim the first row to widen the last row. Both should be wider than 50mm.
Stagger: End joints in adjacent rows must be staggered by a minimum of 300mm. On wide planks (7-9 inch format), a 400-500mm stagger is preferable. Avoid “H-pattern” alignment where end joints in alternating rows line up with each other.
Expansion gap: A 10mm expansion gap must be left at all walls, door jambs, and fixed objects. Spacers placed against the wall during installation maintain this gap. They are removed after the floor is down and the baseboards cover the gap.
Step 5 - Click-lock installation
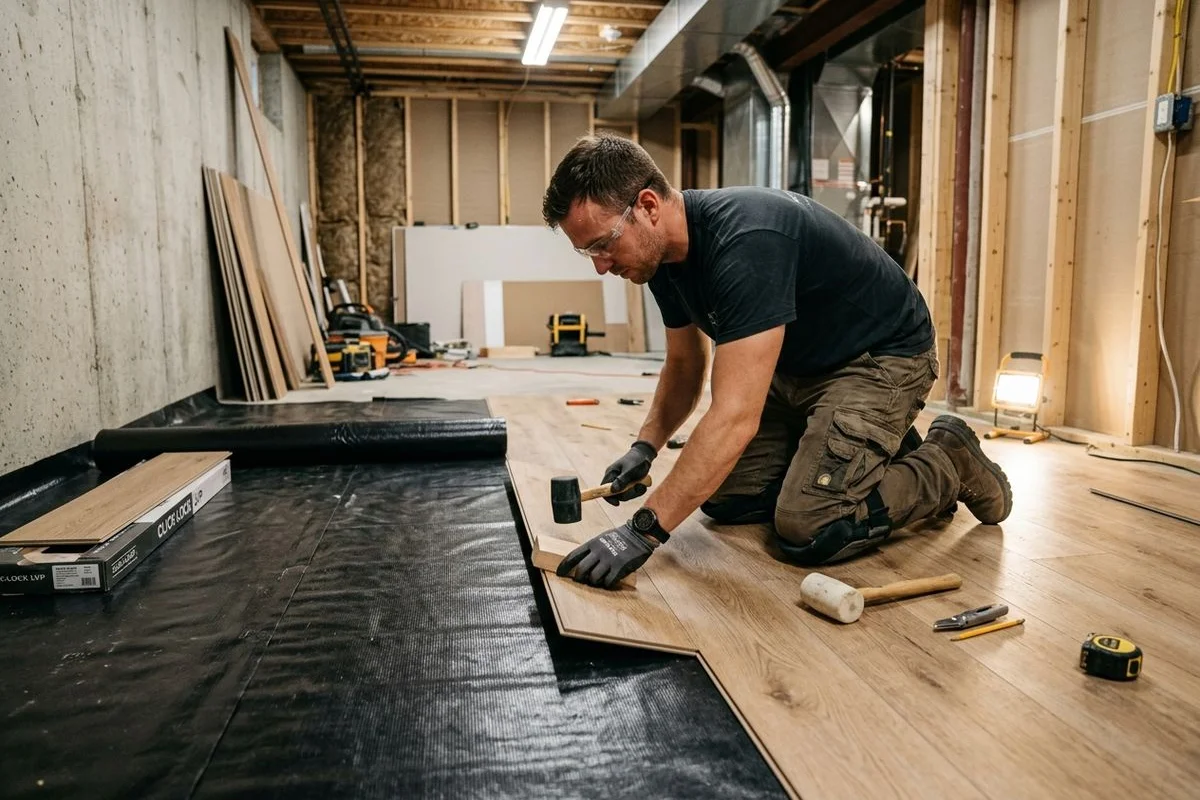
Most SPC LVP uses an angle-lock mechanism. The long edge of the new plank is engaged at a 20-30 degree angle with the groove of the previous row, then lowered flat to lock. Short-end joints within each row are then clicked together, tapping with a rubber mallet and dedicated tapping block to close the joint fully.
Never strike the plank face or the locking edge directly with a mallet. The SPC core is rigid and strong, but the click-lock profile is precisely machined and will fracture under direct impact. Always use a tapping block to distribute the force.
For the final row against the wall where a tapping block cannot be used from the front, a pull bar is used - it hooks over the plank edge and is struck with the mallet to pull the row into position.
Cutting: Straight cuts are made with a vinyl plank cutter (score-and-snap), a circular saw (cut face-down for a cleaner edge), or a jigsaw. A jigsaw is preferred for notches, curves around door architraves, and cuts around HVAC registers.
Door jambs: Undercut door jambs with a handsaw using a scrap of underlayment and plank as a height guide, so the LVP slides under the casing rather than butting against it. This produces a cleaner finish than a coped cut around the casing.
Step 6 - Transitions and completion
At all doorways, T-moulding transition strips join two LVP areas at the same level while allowing both sides to move independently. Reducer strips handle height differences between LVP and adjacent lower flooring (tile, carpet). Stair nose profiles are used on stair tread applications.
Use manufacturer-matched transitions where available. LVP transitions from the same product line are colour-matched to the plank and produce a more cohesive result than generic aftermarket transitions.
Quarter-round or shoe moulding at wall perimeters is nailed to the wall only - never to the LVP. Pinning the moulding to the floor prevents the seasonal movement the floor must make and causes the perimeter to lift.
Glue-down installation: key differences
Full-spread glue-down LVP is bonded directly to the prepared subfloor. There is no click-lock mechanism and no underlayment - the adhesive performs both the bonding and moisture-protection functions.
Appropriate adhesives for glue-down LVP include Bona R848 and Mapei Ultrabond ECO 575 - both pressure-sensitive urethane products that remain flexible after curing. The adhesive is trowelled over the prepared subfloor in sections manageable within its open time (typically 20-30 minutes at 20°C room temperature). Planks are embedded in the adhesive and rolled with a 50kg floor roller to achieve full coverage.
Radiant heat installations: Glue-down is the required method for LVP over radiant in-floor heat. Floating LVP over radiant heat is not typically approved by manufacturers because the heat cycling causes the floating floor to expand and contract unevenly. Always confirm the manufacturer’s maximum surface temperature limit before specifying SPC LVP over radiant heat (most specify 27°C maximum).
Moisture testing for glue-down: SPC LVP’s core is waterproof, but most LVP adhesives are not moisture-tolerant above certain slab RH levels. ASTM F2170 testing with results confirmed within the adhesive manufacturer’s specification is mandatory before any glue-down installation.
| Install phase | Click-lock floating | Glue-down | Note |
|---|---|---|---|
| Subfloor flatness requirement | 3mm/1.8m | 3mm/1.8m (stricter in practice) | Glue-down amplifies visible variation |
| Moisture testing | Required | Required (adhesive tolerance is lower) | ASTM F2170 recommended |
| Underlayment | Yes (or integrated) | No | Adhesive replaces underlayment |
| Walk-on time | Immediate | Light traffic: 24 hours | Furniture: 48-72 hours glue-down |
| Repairability | Individual planks removable | Difficult without damaging floor | Floating is preferred for residential |
| Over radiant heat | Not typically approved | Yes (check temp spec) | Max 27°C surface temperature typical |
| Small room (200 sq ft) | 3-4 hours | 4-5 hours + 24h cure | Click-lock faster for residential |
| Full basement (1,000 sq ft) | 1.5-2 days | 1 day + 24h cure | Glue-down faster on large flat slabs |
Common installation mistakes and how to avoid them
Forgetting the expansion gap at exterior sliding door: The most reliable cause of a buckled LVP floor in a Toronto home. Summer humidity drives the floating floor to expand toward the sliding door track. Without a 10mm gap, the floor buckles. This is not a warranty issue - it is an installation error.
Stacking underlayment on pre-attached underlayment: Creates excessive cushion that causes click-lock joint separation under traffic, typically within 12-18 months.
Installing over radiant heat without checking the manufacturer temperature spec: SPC LVP has a maximum recommended surface temperature. Exceeding it causes the core to soften, allowing the click-lock joints to shift and separate permanently.
Skipping ASTM F2170 moisture testing before glue-down: Adhesive failure from moisture contamination is a common cause of glue-down LVP failures. A surface reading is not sufficient for a glue-down installation.
Not testing slab moisture at all for floating installs: While SPC is waterproof, a wet slab can generate mould under a floating floor even when the LVP itself is undamaged.
Book your LVP installation estimate
Toronto Quality Wood Flooring provides free in-home estimates for all LVP installations, including slab moisture assessment and product specification consultation. We return a fixed-price written quote within 48 hours of the in-home visit. Contact us to schedule your assessment.