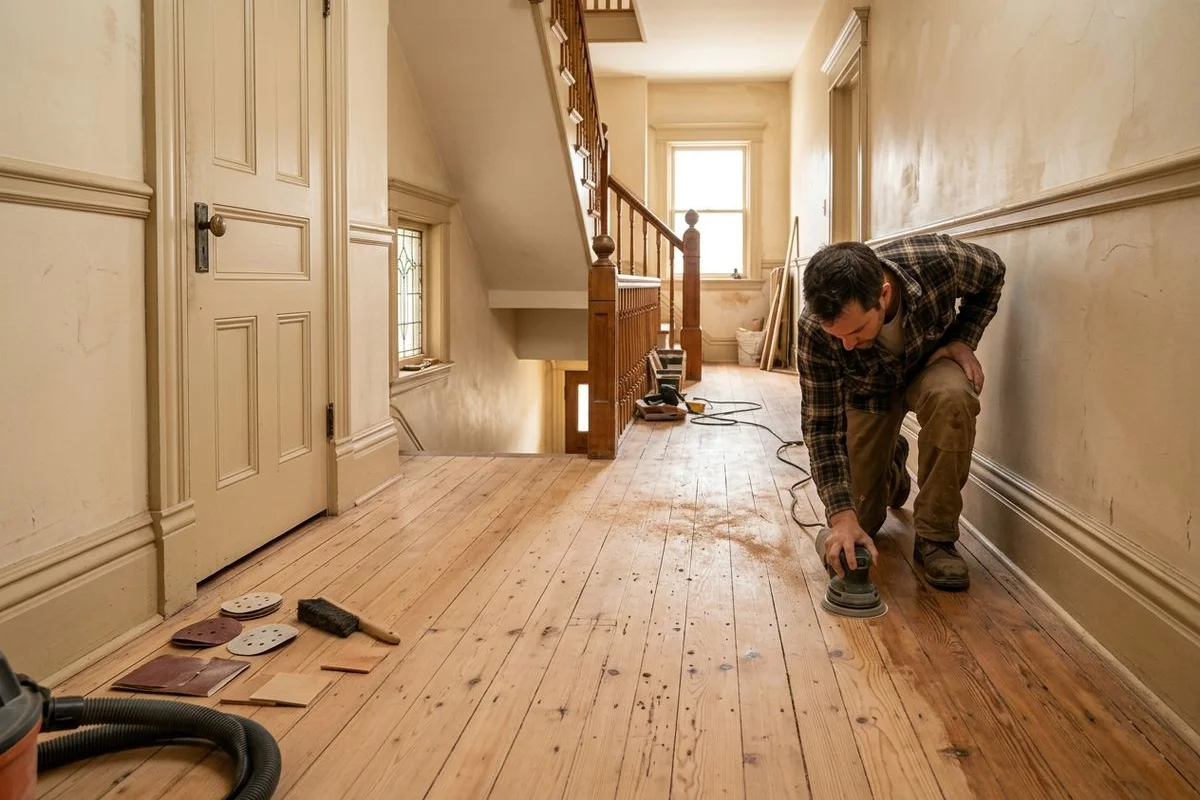
What “lath-and-plaster era” tells you about the floor underneath
Lath-and-plaster construction dates a Toronto home to before roughly 1940. The technique is straightforward: thin wood strips, called lath, were nailed horizontally across wall and ceiling studs, then covered with three successive coats of lime plaster. The result is a heavy, dense wall and ceiling system that is completely different from the drywall construction that replaced it after the Second World War.
For flooring, the construction method is significant because the ceiling lath sits directly beneath the floor joists. Vibration from a drum sander on the upper floor transmits through those joists into the plaster ceiling below - and plaster that has been in place for 80 or 100 years does not take that vibration well. Cracking and delamination of plaster ceilings during floor sanding is a real risk that standard contractors rarely account for and that experienced heritage flooring crews plan around specifically.
The lath-and-plaster construction period also identifies the species, fastening method, and surface character of the original floor. Toronto’s Cabbagetown row houses, Rosedale Victorians, Annex semi-detached homes, Riverdale workers’ cottages, and Leslieville Edwardians all fall into this construction window. Each neighbourhood has its own flooring profile tied to when the block was developed.
The complete framework for this type of work is covered in the historic wood floor restoration hub page.
Floor species by era in lath-and-plaster Toronto homes
Species identification is the first step of any lath-and-plaster era restoration because different species require completely different sanding pressures, stain uptakes, and finish systems. Getting this wrong at the outset produces mismatched repairs and finish failures.
| Era | Species | Face nail? | Typical face width | Restoration approach |
|---|---|---|---|---|
| Pre-1910 | Narrow-strip Red Pine | Yes - square-cut nails | 2.25”-4” | Preserve face nails, Rubio Monocoat 2C flat finish |
| 1910-1925 | Mixed Red Pine + Red Oak transition | Partial - depends on room | 2.25”-3” | Species-confirm per room, period oil finish |
| 1910-1925 (wealthier) | Quartersawn White Oak | No - blind nailed | 2.25” | Ray-fleck preservation, Bona DriFast amber stain |
| 1925-1940 | Red Oak strip, Maple in kitchens | No - blind nailed | 2.25” | Standard heritage refinish, period-correct matte sheen |
Pre-1910 narrow Red Pine is by far the most common species in Cabbagetown and the Annex. It is a softwood with a Janka hardness rating of around 870 lbf - noticeably softer than Red Oak at 1290 lbf or quartersawn White Oak at 1360 lbf. This softness means it takes stain beautifully, develops character marks over time that add to its appearance, and sands faster than hardwood. It also means drum sanding pressure must be reduced or the boards will telegraph the sanding pattern permanently.
Quartersawn White Oak appeared in wealthier Rosedale and Forest Hill homes during the 1910-1925 period. The quartered cut exposes the medullary rays of the oak as a distinctive silver-fleck figure across the face of the board. This figure is completely absent from plain-sawn oak of the same species - any patch made with flat-sawn oak on a quartersawn floor will be visually obvious and ruins the restoration.
The specific challenges of lath-and-plaster era floors
Vibration and plaster ceiling risk
The most under-discussed risk in lath-and-plaster restoration is ceiling damage below. A standard drum sander weighs 80-100 kg and operates with significant vibration. When run on a first-floor room with a lath-and-plaster ceiling directly beneath, that vibration travels through the floor joists and into a plaster system that may have cracking already present from decades of seasonal movement.
Toronto Quality Wood Flooring mitigates this risk by using lighter-weight edge sanders and orbital machines in rooms directly above lath-and-plaster ceilings, reserving drum sanding for sections where the joist direction runs parallel to the sanding direction and the ceiling below is drywall. We also assess existing ceiling condition at the start of every lath-and-plaster project and document it photographically before any sanding begins.
Hidden subfloor gaps
Original plank subfloors under lath-and-plaster era finished floors often have gaps between the diagonal subfloor planks. These gaps allow finish to bleed downward during application, pulling finish away from the surface and creating adhesion inconsistency. The fix is to confirm subfloor gap locations before applying finish and to seal bleed-through paths with an appropriate filler before the finish coat.
Multiple incompatible finish layers
Pre-1940 floors in Toronto have typically been refinished at least once, sometimes three or four times. Those prior finishes may include original shellac, wax, early oil-modified polyurethane from the 1960s, and modern waterborne finishes layered on top of each other. These layers interact unpredictably with new finish applications. The safest approach is to strip to bare wood and start clean, rather than attempting to recoat over unknown existing finishes.
Face-nailed softwood boards
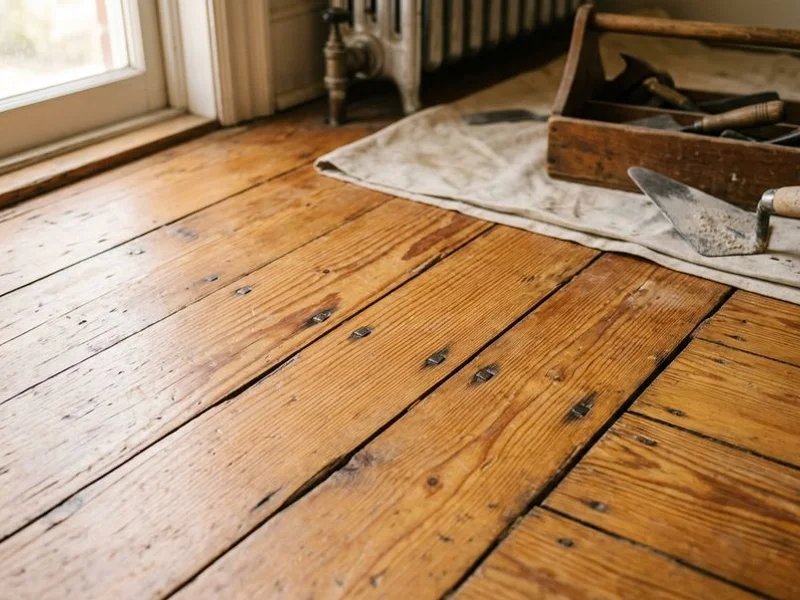
Pre-1910 Red Pine floors were face-nailed - fasteners driven straight through the board face. This leaves visible rectangular impressions from the original square-cut nails. These patterns are character elements in the floor and should be preserved in restoration work. Standard refinishing fills them with wood putty and sands flush, which erases the evidence of original construction.
Finish bleeding into board gaps
Century-old face-nailed boards develop natural gaps as the wood moves seasonally over decades. Toronto winters drop indoor relative humidity into the 25-35% range, and summers push it back up to 55-65%. This seasonal movement is normal. The problem is that standard polyurethane applied over boards with these gaps pools in the gaps and is squeezed out as sticky beads during summer expansion. Period-correct hardwax oils - Rubio Monocoat 2C being the standard - penetrate the wood fibre rather than forming a surface film, so they do not pool in gaps the same way.
Working in a lath-and-plaster home
Beyond the technical challenges, lath-and-plaster homes require a specific approach to dust management. Vibration from sanding equipment can dislodge plaster dust from walls and ceilings in addition to generating wood dust from the sanding itself. Combined, these are a respiratory hazard and a cleaning problem for the homeowner.
The Bona DCS dustless containment system is standard on all Toronto Quality Wood Flooring lath-and-plaster projects. This system captures airborne dust down to sub-micron particle size at source, keeping the living space habitable during the restoration and protecting the homeowner from exposure to the fine particles that old plaster releases under vibration.
Timeline for a lath-and-plaster era restoration runs 7-14 days for standard projects. The longer window relative to modern hardwood refinishing (4-5 days) accounts for: the more careful sanding approach required to protect plaster below, the time needed to assess and address multiple legacy finish layers, and the acclimatisation time required for any reclaimed boards introduced as replacements.
Before committing to a full project, test corners and closets for remaining floor thickness. Lath-and-plaster era floors that have been refinished aggressively in prior decades may have insufficient wear layer remaining in high-traffic areas even if the protected corners still show generous thickness.
You can read about the diagnostic process for assessing individual boards in the companion guide on what historic wood floor restoration is.
What the finished result looks like
A properly completed lath-and-plaster era restoration reads as original. The face-nail patterns are visible in raking light. The board colour has amber warmth from the Bona DriFast stain or the clear Rubio Monocoat 2C penetrating finish. The sheen is flat to satin - appropriate to the era - rather than the plastic-looking gloss of modern polyurethane. Species transitions between rooms, where they exist, are explained by the building’s construction history and are part of its character.
The NWFA-compliant restoration process produces a floor that is structurally sound, period-accurate in appearance, and finished with zero-VOC hardwax oil that meets current Canadian indoor air quality standards.
Toronto Quality Wood Flooring provides a free in-home estimate and a 48-hour fixed-price written quote for lath-and-plaster era restoration projects across Toronto. Contact us to schedule your diagnostic visit.